If you’re here, chances are you’ve heard the term “magic circle” thrown around in the crochet world, and maybe it sounds a bit mysterious or even intimidating. 

But fear not! By the time you finish reading this post, you’ll be a magic circle pro, ready to tackle all sorts of crochet projects with confidence.

The magic circle (sometimes called a magic ring or magic loop) is a technique that allows you to start crocheting in the round without leaving a hole in the center. 

It’s especially handy for projects like amigurumi, hats, and anything else that starts with a round base. 

So, grab your hook, a ball of yarn, and let’s dive into the magical world of circles!

What’s So Magical About the Magic Circle?

How to Crochet a Magic Circle

Before we get into the nitty-gritty of how to crochet a magic circle, let’s talk about why it’s such a game-changer. 

The magic circle gives you a tightly closed center, which means no annoying holes in your work, perfect for projects where a neat, polished look is key.

Imagine you’re crocheting a cute amigurumi bunny. 

You start with the traditional chain method, but there’s a pesky little hole at the top of your bunny’s head. 

Not exactly the look you were going for, right? 

The magic circle solves this problem, giving you a seamless start that looks as professional as it gets.

What You’ll Need

  • Yarn: Any yarn will do, but I recommend starting with something smooth and medium weight so you can see your stitches clearly.
  • Crochet Hook: Use the size recommended for your yarn. Typically, for a medium-weight yarn, a 4.0 mm (G-6) or 5.0 mm (H-8) hook works great.
  • Scissors: To snip your yarn when you’re done.
  • Stitch Marker (optional): This can help you keep track of your rounds.

Step by Step - How to Crochet a Magic Circle

Now, let’s get into the fun part, actually making the magic circle!

Step 1: Form the Loop

Start by holding the tail end of your yarn in your left hand (if you’re right-handed) and loop the working yarn (the yarn connected to the ball) around your fingers. 

The key here is to cross the yarn over itself to form an “X” on the front of your fingers.

Step 2: Insert Your Hook

Slide your hook under the first strand of yarn (the part that crosses over) and grab the second strand of yarn (the working yarn) with your hook. 

Pull it through the loop, but don’t let the loop slip off your fingers just yet.

Step 3: Chain 1 (or more)

With the loop still on your hook, chain 1 to secure the loop. 

Depending on the pattern you’re following, you may need to chain more (usually 1-3 chains) to get the right height for your first row of stitches.

Step 4: Crochet Into the Loop

Here comes the magic part! Work your first row of stitches into the loop. 

Typically, you’ll need 6 single crochets (sc) for a basic magic circle. 

Insert your hook into the loop, yarn over, pull up a loop, yarn over again, and pull through both loops on your hook. 

Repeat this process until you’ve made the required number of stitches.

Remember, all of these stitches are going into the same loop! It might feel a bit fiddly at first, but trust me, it gets easier with practice.

Step 5: Close the Circle

Once you’ve crocheted all your stitches into the loop, it’s time to pull that tail tight and close the circle. 

Gently tug on the tail end of the yarn to cinch the loop closed. 

Voila! The hole disappears, leaving you with a beautifully tight, seamless circle.

Step 6: Join Your Round (Optional)

Depending on your pattern, you may need to join your round with a slip stitch. 

Simply insert your hook into the first stitch of the round, yarn over, and pull through both loops on your hook. 

And just like that, you’ve completed your magic circle!
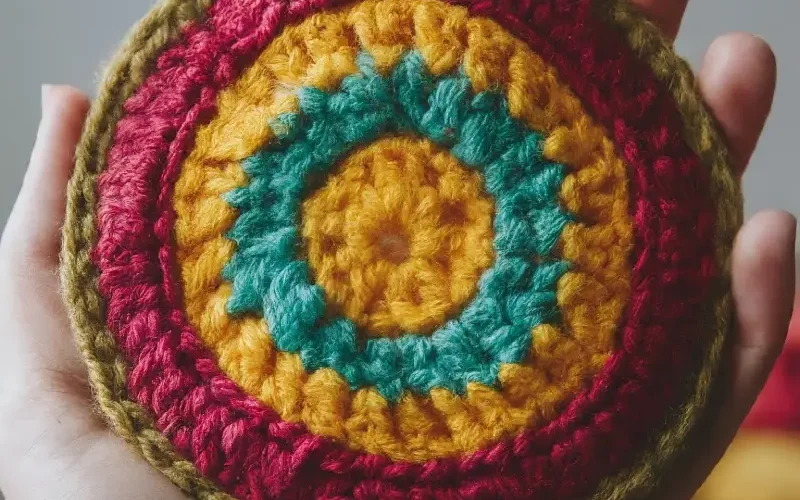
Some Common Issues

Now, let’s talk about a few hiccups you might run into when learning the magic circle and how to fix them.

The Loop Won’t Close All the Way

This usually happens if your initial loop wasn’t crossed tightly enough.

If this happens, don’t stress, just start over and make sure your loop is snug before you start crocheting into it.

The Circle Opens Back Up After Crocheting

If your magic circle starts to loosen up after a few rounds, you might not have secured the tail well enough. 

Make sure to pull it tight and weave in the end securely when you finish.

It Feels Awkward to Hold

The magic circle can feel a bit tricky to hold, especially if you’re new to crochet. 

Keep practicing! The more you do it, the more natural it will feel. 

Try loosening your grip or adjusting how you hold the yarn to find what works best for you.

When to Use the Magic Circle!

Now that you’ve mastered the magic circle, you might be wondering when to use it. 

Here are a few crochet projects that will benefit from this technique:

Amigurumi: Whether you’re making a tiny teddy bear or a cuddly octopus, a magic circle is the go-to for creating the tight, seamless start that amigurumi demands.

Hats: When crocheting a hat from the top down, the magic circle gives you a flawless start without any gaps.

Granny Squares: Some granny square patterns begin with a magic circle instead of the traditional chain loop, offering a tighter center.

Bags and Baskets: For circular bases, the magic circle is perfect for a strong, sturdy foundation.

Practice Makes Perfect

The magic circle might take a bit of practice, but once you’ve got the hang of it, you’ll never look back. 

It’s one of those crochet skills that instantly elevates your projects, making them look clean and professional. Plus, it opens the door to so many new possibilities in your crochet journey.

So, grab your hook and yarn, and start practicing! Before you know it, you’ll be whipping up magic circles like a pro, impressing your friends, and creating beautiful crochet projects that you can be proud of.

Be sure to share your beautiful work on crochet patternz community. I’d love to see how you personalize your project!

Happy crocheting, and may your circles always be magical!