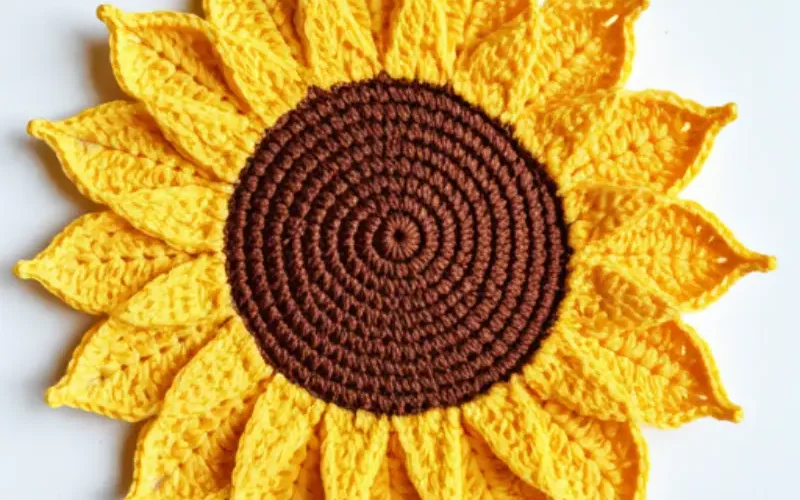
Now, let’s get into the fun part, actually crocheting this beautiful sunflower doily!
Step 1: Crocheting the Center of the Sunflower
Start with your brown yarn. This will be the center of your sunflower, where all the seeds would go in nature.
Magic Circle: Begin with a magic circle (or chain 4 and sl st to form a ring).
Round 1: Ch 3 (counts as first dc), 11 dc into the magic circle. Sl st to the top of the starting ch 3 to join. (12 stitches total)
Round 2: Ch 3, dc in the same stitch. 2 dc in each stitch around. Sl st to join. (24 stitches total)
Round 3: Ch 3, dc in the same stitch, 1 dc in next stitch. 2 dc in next stitch, 1 dc in next stitch around. Sl st to join. (36 stitches total)
Round 4: Ch 1, sc in each stitch around. Sl st to join. (36 stitches)
At this point, you’ve formed the brown center of your sunflower, and it should look like a flat circle.
Time to switch to the bright, cheerful yellow for the petals!
Step 2: Creating the Sunflower Petals
Now comes the part that really brings the sunflower to life—those bright, happy petals.
Round 5: Attach your yellow yarn. Ch 3, dc in the next 2 stitches.
Ch 3, sk 1 stitch, dc in the next 3 stitches.
You should now have little spaces between every group of 3 dc.
Round 6: In each ch-3 space from the previous round: sc, hdc, 3 dc, hdc, sc.
This forms one petal. Repeat in every ch-3 space around. Sl st to the base of the first petal to join.
By the end of this round, you’ll have a lovely ring of petals, and it should be looking very sunflowerly!
Step 3: Adding More Petal Layers (Optional)
If you want a fuller sunflower with multiple layers of petals, this is where you can add more rows of petals.
Round 7: To create a second layer of petals, ch 3, and sl st to the back loops only of the previous round.
Ch 3, sk 1 stitch, dc in the next 3 stitches all the way around.
Round 8: Repeat Round 6, working into the ch-3 spaces you created in the previous round to form another layer of petals.
The petals will now overlap, giving your sunflower more dimension.
Step 4: Crocheting the Green Leaves (or Outer Border)
Let’s not forget the leaves! Just like in nature, we want our sunflower to have a little green to frame it.
Round 9: Switch to your green yarn.
Working behind the petals, attach the yarn and ch 4. Sk 1 stitch, dc in the next stitch, ch 3, sk 1 stitch. Repeat around.
You’re essentially creating a foundation for the leaves to sit on.
Round 10: In each ch-3 space, work as follows: sc, hdc, 5 dc, hdc, sc.
These will form small leaf shapes around the outer edge of your sunflower.
Step 5: Finishing Touches
Once you’ve completed the leaves, your sunflower doily is almost done!
Weaving in Ends: Use your tapestry needle to weave in any loose ends.
Make sure they’re secure but not too tight, so your stitches stay smooth and even.
Blocking: If your doily is curling or not lying flat, lightly block it by pinning it to a flat surface and misting it with water.
Let it dry completely before removing the pins.
Tips for Success:
Keep Your Tension Even
Petals and leaves can look a bit wonky if your tension is inconsistent.
Practice keeping your stitches even as you work, and don’t worry if your first few tries aren’t perfect crochet is a journey, not a race!
Experiment with Colors
Sunflowers are traditionally yellow, but why stop there?
Try making a sunflower doily in shades of red, orange, or even purple for a unique twist.
Use Stitch Markers
If you’re new to working in the round, use stitch markers to keep track of where your rounds begin and end.
This will save you a lot of counting and potential frustration.
