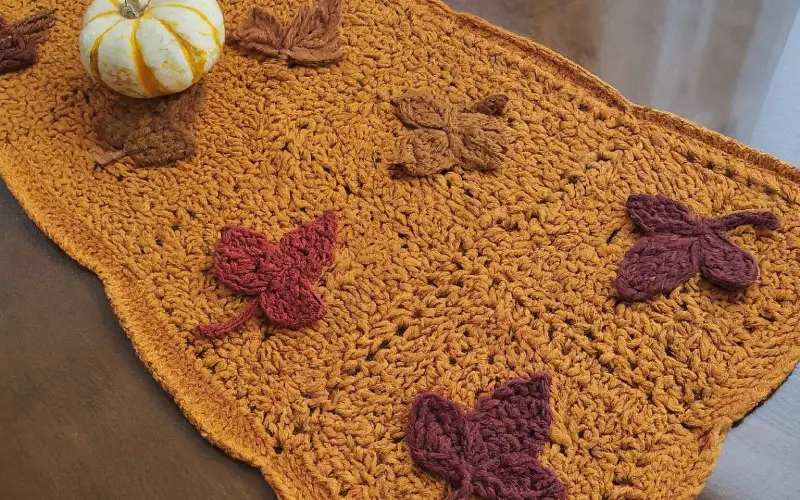
Step 1: Start with the Foundation Chain
Begin by chaining a multiple of 20 plus 1.
The exact number depends on how long you want your table runner to be.
For a standard runner, around 141 chains should do the trick.
Step 2: Work the Base Rows
Row 1: Start by working a single crochet into the second chain from the hook. Continue with a single crochet in each chain across. Chain 1, turn.
Row 2: Work a double crochet in each stitch across. Chain 1, turn.
Row 3-4: Repeat Row 2. These rows create a solid base for your leafy motifs.
Step 3: Crochet the Leaves
Now, let’s add those gorgeous leaves!
Row 5: Work 4 dc in the first stitch, skip the next stitch, and sl st in the next. This creates your first “leaf” cluster.
Row 6: Repeat Row 5 across. Make sure to end with a single dc in the last stitch. Chain 1, turn.
Row 7: For the next row, switch colors if you want to alternate leaf colors.
Repeat Row 6, but this time start with a sl st, followed by 4 dc in the next stitch.
Step 4: Create the Leafy Edges
To make the edges of your runner extra special, you can add a picot edge:
Work a sc along the edge of your runner.
Picot stitch: Chain 3, then slip stitch into the first chain. Continue sc along the edge, adding a picot stitch every few stitches for that cute, bumpy texture.
Step 5: Finishing Touches
Once you’ve reached your desired length, fasten off and weave in all your ends with the tapestry needle. Block your runner lightly to straighten out any wobbly edges.
Styling Tips
Pair your table runner with simple, neutral tableware to let the vibrant autumn colors pop.
Add some candles or a vase with fall flowers for an extra cozy vibe.
Hosting a fall dinner? Your new table runner is the perfect backdrop for a hearty spread of soups, pies, and all things pumpkin spice!
