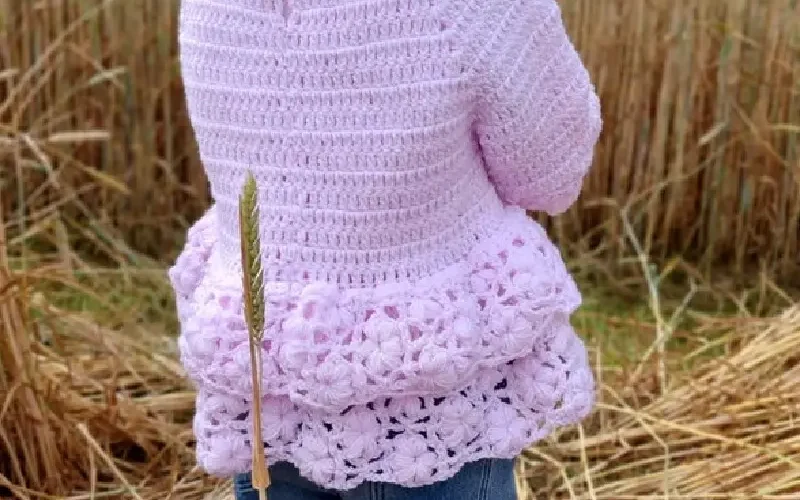
The Body of the Sweater:
Start by making the body of the sweater using double crochet (dc) stitches.
This will form the base of the garment, giving it a sturdy yet soft texture.
Step 1: Foundation Chain:
Chain (ch) a multiple of 60 to start (depending on the baby’s size, you can adjust accordingly, for a 6-12 month size, ch 60).
Join the chain into a circle, being careful not to twist.
Step 2: Round 1 – 10 (Main Body):
Chain 3 (this counts as your first double crochet), then double crochet in each stitch around.
Join with a slip stitch (sl st) to the top of the starting chain 3.
Repeat this process for 10 rounds or until the body length reaches the desired measurement (approximately 7-8 inches for a 6-12 month size).
Step 3: Divide for the Armholes:
Chain 3, and dc into the next 10 stitches.
Chain 10 and skip 10 stitches (this creates the armhole).
Dc into the next 20 stitches, chain 10, skip 10 stitches, then dc in the next 10 stitches to complete the round.
Continue working in rounds for 2-3 more rounds, joining each round with a slip stitch.
Crochet the Sleeves:
Now that the armholes are created, we can focus on working the sleeves.
Step 1: Attach Yarn to the Armhole:
Attach the yarn to the center of one armhole.
Chain 3, and then double crochet around the armhole evenly.
You should have approximately 30 stitches.
Join with a sl st and chain 3.
Step 2: Crochet the Sleeve Length:
Continue working in dc rounds until the sleeve reaches the desired length (approximately 4-5 inches for a baby-sized sweater).
Fasten off and repeat for the second sleeve.
Adding the Ruffle and Lace Details:
This is where the magic happens! The ruffled peplum and lace edging really make this sweater stand out.
The ruffles are created using a floral lace pattern to add texture and a delicate touch.
Step 1: Crochet the Lace Peplum:
Attach your yarn to the bottom of the sweater.
Chain 4 (counts as 1 tr) and then triple crochet (tr) into the same stitch.
Continue adding 2 tr stitches into each dc from the previous row around the entire sweater.
On the next round, you will alternate between 3 tr and 1 chain stitch to create the floral lace look.
This will form the base for the lower ruffles.
Repeat for 4-5 rounds or until you reach your desired length.
Step 2: Crochet the Lace Cuffs on the Sleeves:
Attach the yarn to the cuff of the sleeve, and work the same lace pattern as the peplum, adding a delicate ruffle to the edge of the sleeve.
Repeat for 3 rounds.
Step 3: Crochet the Ruffle Layers:
After completing the lace details, it’s time to add the final ruffle layers to the peplum.
Attach the yarn once more at the base of the floral lace and work in rounds using double crochet and chain stitches to create the layered effect.
Work about 3-4 rounds to form the final ruffled peplum.
