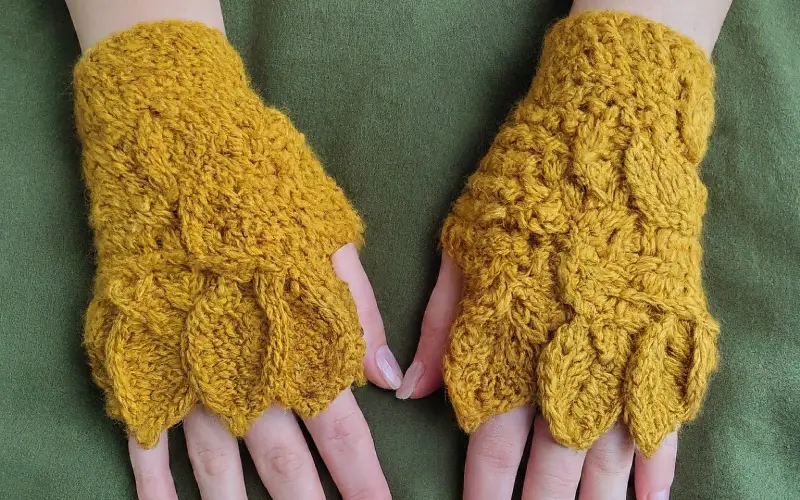
Step 1: Crochet the Base of the Glove
We’ll start by creating the main body of the glove, which will be worked in rounds.
Let’s begin with Chain 32.
Round 1: In the 2nd chain from the hook, work 1 sc. Continue with 1 sc in each chain across. At the end of the row, work 1 sc in the last chain, then turn your work so you’re working in the round. Work 1 sc in each stitch around (total 31 sc). Join with a sl st.
Round 2: Chain 1, 1 sc in next 6 stitches, 2 sc in next stitch. Repeat from * around (total 35 sc). Join with a sl st.
Round 3-9: Work 1 sc in each stitch around. Join with a sl st. Continue until the piece measures about 7 inches from the start.
Add Thumb Hole:
Round 10: Chain 1, sc in the next 12 stitches, ch 8 (this will be the thumb hole), skip 8 stitches, sc in remaining stitches around. Join with a sl st.
Round 11-14: Work 1 sc in each stitch around, including across the thumb hole chain (working 1 sc in each chain). Join with a sl st.
Finish Off: Fasten off and weave in ends.
Step 2: Add the Leaf Motif
Now for the fun part—adding a lovely leaf motif to your gloves!
Leaf Motif (Make 2):
Foundation: Chain 10.
Row 1: In the 2nd chain from the hook, work 1 sc, 1 hdc, 2 dc, 1 hdc, 1 sc. Turn.
Row 2: Chain 1, work 1 sc in each stitch across. Turn.
Row 3: Work 1 sc in the first 2 stitches, 1 hdc in the next 2 stitches, 2 dc in the next 2 stitches, 1 hdc in the next 2 stitches, 1 sc in the last 2 stitches. Fasten off, leaving a long tail for sewing.
Attach the Leaf Motif:
Position the leaf motif where you’d like it on the glove. Use your tapestry needle to sew it onto the top of the glove.
Step 3: Final Touches
Lightly block the leaf motif to give it a crisp, defined shape.
Add buttons or decorative beads for extra flair.
