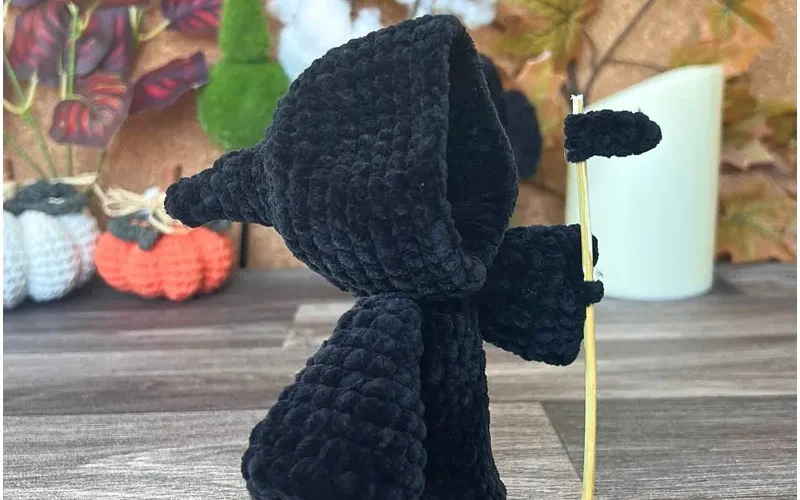
Step 1: Crochet the Grim Reaper’s Head (Skull)
Let’s start with the head, because what’s a Grim Reaper without a spooky skull?
With white yarn:
Make a magic ring and work 6 single crochets into the ring. (6)
Round 1: Increase in each stitch around. (12)
Round 2: (Sc in the next stitch, inc) repeat around. (18)
Round 3: (Sc in the next 2 stitches, inc) repeat around. (24)
Round 4-6: Sc around (24).
Round 7: (Sc in the next 2 stitches, dec) repeat around. (18)
Round 8: (Sc in the next stitch, dec) repeat around. (12)
Stuff the head with polyfill.
Round 9: Decrease around. (6)
Fasten off and leave a long tail for sewing. Set aside.
Step 2: Create the Grim Reaper’s Body (Robe)
Now, onto the spooky cloak! This will be made in one piece.
With black yarn:
Make a magic ring and work 6 sc into the ring. (6)
Round 1: Inc in each stitch around. (12)
Round 2: (Sc in the next stitch, inc) repeat around. (18)
Round 3: (Sc in the next 2 stitches, inc) repeat around. (24)
Round 4-9: Sc around. (24)
Round 10: (Sc in the next 2 stitches, dec) repeat around. (18)
Round 11-12: Sc around. (18)
Round 13: (Sc in the next stitch, dec) repeat around. (12)
Fasten off, stuff the body with polyfill, and leave a long tail for sewing.
Step 3: Crochet the Hood
Our Grim Reaper needs to stay in the shadows, right? Let’s make a cozy hood for him!
With black yarn:
Ch 28 and sl st into the first chain to form a circle.
Round 1: Sc in each stitch around. (28)
Round 2-6: Sc around. (28)
Round 7: (Sc in the next 6 stitches, dec) repeat around. (24)
Round 8: (Sc in the next 5 stitches, dec) repeat around. (20)
Round 9: Sc around. (20)
Fasten off, and now you have a perfect little hood to pop onto the head later!
Step 4: Crochet the Grim Reaper’s Scythe
A Grim Reaper isn’t complete without a scythe, right? Let’s make this mini but mighty tool.
With grey yarn:
Make a magic ring and work 6 sc into the ring. (6)
Round 1: Inc in each stitch around. (12)
Round 2-6: Sc around. (12)
Fasten off and switch to black yarn for the blade.
With black yarn:
Ch 15 and sl st back down the chain.
Attach the scythe handle to the chain by wrapping the yarn and securing with a tapestry needle.
Step 5: Assemble Your Grim Reaper
We’re almost done! Now, let’s bring all the pieces together.
Attach the head to the body using the long tail from the head piece and your tapestry needle.
Pop the hood onto the head and sew it in place so it stays secure.
Add details to the face: Use black thread or embroidery floss to stitch small eyes, or use tiny safety eyes for an extra cute look.
Sew the scythe to one of the arms (or both if you want it to look like he’s holding it with both hands).
Step 6: Add Final Details
Get creative with those final details! Add a red heart if you want a slightly whimsical Grim Reaper, or maybe give him a little pouch to collect souls (just kidding!).
You can even embroider a tiny smile to give him some charm.
