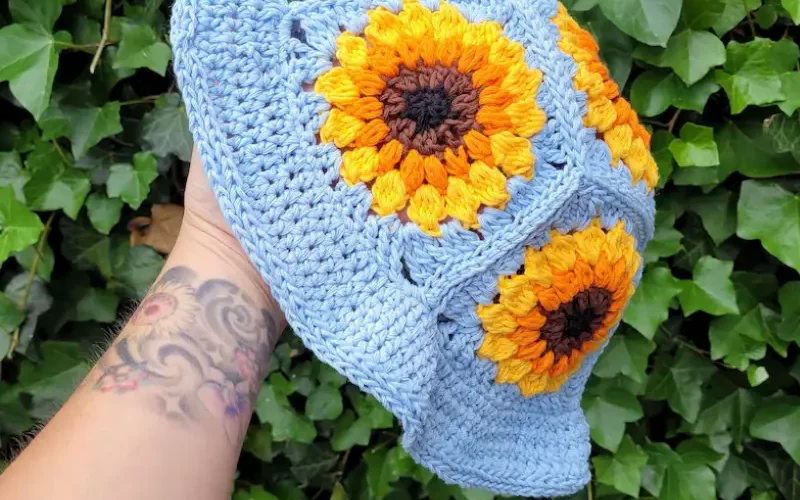
Now let’s break this down into a few simple parts: the sunflower, the bucket hat base, and putting it all together!
Step 1: Creating the Sunflower Top
We’re starting with the most exciting part, the sunflower!
This part of the hat will sit on top of your head, making it the first thing people notice (and adore).
Round 1 (Center of Sunflower):
With your brown yarn, make a magic ring (or ch 4 and join to form a circle).
Ch 2 (counts as a dc here and throughout), and work 11 dc into the ring.
Pull the ring tight and join with a sl st to the first dc. You should have 12 stitches.
Round 2:
Ch 2, dc in the same stitch, then 2 dc in each stitch around. Join with a sl st. (24 stitches)
Round 3:
Ch 2, dc in the same stitch, 1 dc in the next stitch, then 2 dc in the next. Repeat this pattern (1 dc, 2 dc) around. Join with a sl st. (36 stitches)
Round 4:
Continue increasing by working 1 dc in the first 2 stitches, then 2 dc in the next.
Repeat this around. (48 stitches)
Change to Yellow Yarn:
After completing your increases, join your yellow yarn to start the sunflower petals.
Round 5 (Petals):
Petal Pattern: Ch 3, skip 1 stitch, sl st in the next stitch. Repeat this around to create a base for your petals.
Round 6 (Building Petals):
Petal Rows: Into each chain space from the previous row, work [1 sc, 1 hdc, 3 dc, 1 hdc, 1 sc].
This forms a petal. Repeat in each ch-3 space around.
Look at that sunflower bloom! Each petal should now fan out beautifully.
Step 2: Making the Bucket Hat Base
Now that we’ve got our sunflower, it’s time to crochet the actual bucket hat that will frame it.
You’ll be using the green yarn to represent the sunflower’s stem and leaves, keeping it cohesive and floral.
Starting the Hat:
Attach the green yarn to the sunflower’s edge.
Ch 2 and work a round of dc evenly around the sunflower’s outer edge.
Be sure to place your stitches evenly, this will form the base of the hat.
Building the Body:
From here, we’ll work in rounds to create the bucket hat shape.
Rounds 2-5: Work dc evenly around with no increases. This builds the height of the hat.
You can do a few rounds of half double crochet (hdc) if you want a more textured look.
Shaping the Brim:
Round 6 (Brim Increases): For that flared bucket hat look, we’ll start increasing.
Work [2 dc in 1 stitch, 1 dc in the next stitch] all the way around.
Round 7: Continue to increase by working [2 dc, 2 dc], followed by [2 dc, 3 dc] in subsequent rounds until your brim reaches your desired width.
Finishing Off:
When your brim is the size you like (I suggest 5-6 rounds of increases), you can finish with a round of single crochet to give it a neat edge.
Fasten off and weave in any loose ends.
Part 3: Adding a Stem (Optional)
If you really want to go the extra mile with your sunflower hat, why not add a little “stem” or “leaf” detail to the side? You can crochet a small green leaf using simple increases and decreases:
Leaf Pattern:
Ch 7.
Row 1: Starting in the second chain from the hook, sc across.
Row 2: Turn, ch 1, sc, hdc in the next stitch, dc in the next 3 stitches, hdc, sc in the last stitch.
Row 3: Turn, ch 1, sc2tog, hdc2tog, dc2tog, hdc2tog, sc2tog.
Fasten off and attach to the hat with a few stitches.
