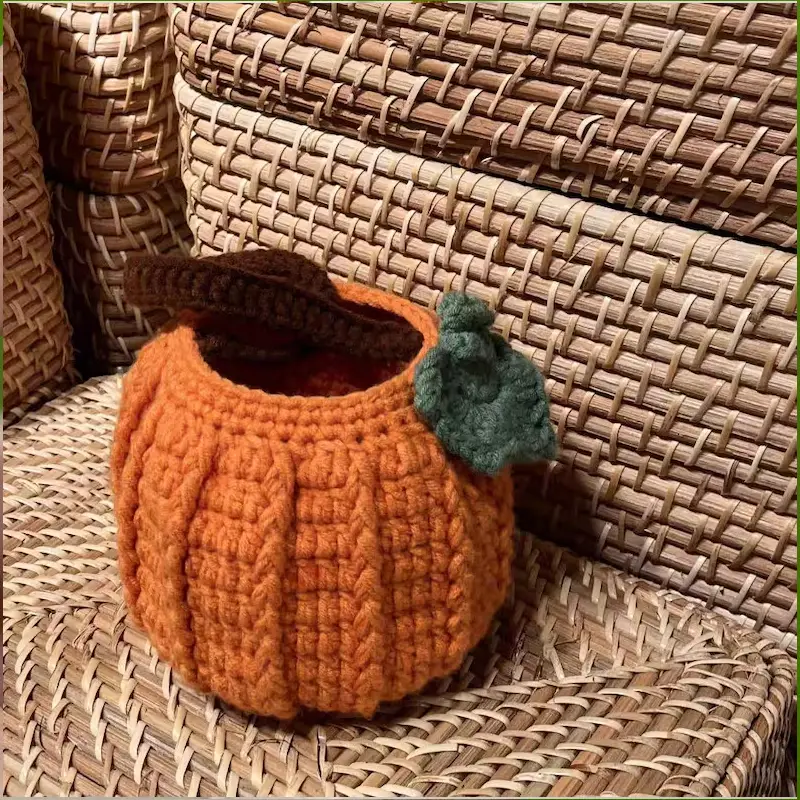
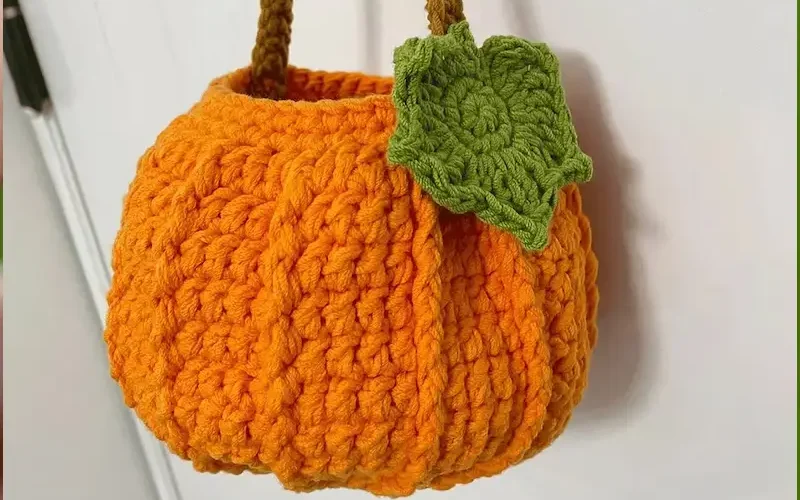
How to Crochet an Orange Autumn Pumpkin Bag for Halloween: A Fun and Festive Project
Halloween is just around the corner, and what better way to celebrate the season than with a handmade Orange Autumn Pumpkin Bag?
This adorable crochet project is perfect for trick-or-treating, fall decor, or even as a cute little tote for your autumn adventures.
Plus, it’s a great way to showcase your crochet skills while adding a personal touch to your Halloween festivities.
In this step by step guide, I’ll show you how to crochet an orange pumpkin bag that’s not only festive but also functional.
Whether you’re a beginner or a seasoned crocheter, this project is fun, easy, and super customizable.
So, grab your hook, some orange yarn, and let’s get started!

Why Crochet a Pumpkin Bag?
Before diving into the pattern, let’s talk about why this project is a must for your Halloween crochet list:
Perfect for Halloween
What says Halloween more than a pumpkin? This bag is both festive and functional, perfect for candy or as part of a costume.
Beginner Friendly
With simple stitches like single crochet and double crochet, this project is great for beginners looking to make something fun for the fall season.
Customizable
You can easily adjust the size, color, and style of the bag to make it uniquely yours.
Add leaves, vines, or even a jack-o’-lantern face to give it a spooky twist!
Reusable
This pumpkin bag is not just for Halloween, it’s a fun autumn accessory that can be used year after year.
What You’ll Need
Here’s a list of materials you’ll need to crochet your orange autumn pumpkin bag:
- Yarn: You’ll need worsted weight yarn (category 4) in orange for the pumpkin body. For the stem and optional leaves, choose green or brown yarn.
- Crochet Hook: A 5.0 mm (H) hook works well for this project, but feel free to adjust the hook size to match your yarn.
- Yarn Needle: For weaving in ends and sewing on any extra details like leaves or a stem.
- Scissors: To cut your yarn.
- Stitch Marker: Optional, but helpful for keeping track of rounds since this project is worked in the round.
- Measuring Tape (optional): To help you size the bag and make sure it’s the right length.
Pumpkin Bag for Halloween Crochet Patter: Step by Step
Step 1: Crocheting the Pumpkin Base
We’ll start by making the base of the pumpkin bag, which will be worked in rounds.
Magic Ring or Chain 2: Begin with a magic ring (or chain 2) to work in the round.
Round 1: Work 6 single crochets (sc) into the magic ring or into the second chain from the hook. Pull tight to close the ring. (6 stitches)
Round 2: Work 2 single crochets into each stitch around. (12 stitches)
Round 3: 1 sc in the next stitch, 2 sc in the following stitch—repeat around. (18 stitches)
Round 4: 1 sc in the next 2 stitches, 2 sc in the following stitch—repeat around. (24 stitches)
Round 5: 1 sc in the next 3 stitches, 2 sc in the following stitch—repeat around. (30 stitches)
Continue increasing in this manner until you’ve reached your desired base size.
For a medium-sized bag, aim for around 8-10 rounds, ending with about 48-60 stitches.
Step 2: Building the Pumpkin Body
Now that we have the base of the pumpkin, it’s time to work on the body.
Round 1: Once you’ve reached your desired base size, work 1 single crochet in the back loop only (BLO) of each stitch around.
This will create a nice ridge that helps the base and sides stand up. (No increases, just maintain the same stitch count from the last round.)
Rounds 2-12: Work 1 sc in each stitch around.
Continue until the body of your pumpkin bag reaches your desired height.
For a medium-sized bag, about 10-12 rounds should suffice, but you can always adjust this based on how tall you want your bag to be.
Step 3: Adding the Pumpkin Ridges
To give your pumpkin bag that classic pumpkin shape with ridges, we’re going to switch from single crochet to double crochet and add some decreases.
Round 13: 1 dc in the next 6 stitches, dc2tog (double crochet two stitches together)—repeat around. (This will start to create the curved ridges of the pumpkin.)
Round 14: 1 dc in the next 5 stitches, dc2tog—repeat around.
Round 15: Continue decreasing by repeating 1 dc in the next 4 stitches, dc2tog around.
Continue decreasing in this pattern until you have about 24-30 stitches left. This will create a rounder, fuller pumpkin shape.
Step 4: Creating the Bag Handles
Now that the body of your pumpkin is done, it’s time to add handles.
Round 16: Work 1 sc in each stitch around.
Round 17: Work 1 sc in the first 5 stitches, chain 20 (this will be your handle), skip the next 10 stitches, and then sc into the following stitch.
Repeat this for the other side to create two handles.
Round 18: Work 1 sc in each stitch and chain around to strengthen the handles.
Step 5: Adding the Stem and Leaves (Optional)
To give your pumpkin bag an extra cute, finished look, you can add a crocheted stem and some leaves.
Stem
Using brown yarn, make a magic ring and work 6 sc into the ring.
Continue working 1 sc in each stitch around for about 4-5 rounds until you have a small stem.
Sew it onto the top of the pumpkin.
Leaves
With green yarn, chain 10, and work back down the chain with 1 sc, 1 hdc (half double crochet), 3 dc (double crochet), 1 hdc, and 1 sc. Sew the leaves onto the top near the stem.
Customizing Your Pumpkin Bag

One of the best parts about this project is how customizable it is! Here are some fun ways to personalize your pumpkin bag:
Jack-o’-Lantern Face: Use black yarn or felt to create a spooky jack-o’-lantern face for a Halloween twist.
Vary the Size: Make a mini pumpkin bag for kids or a giant one for extra candy.
Color Variations: While orange is traditional, you can make your pumpkin bag in any fall color, like mustard yellow, burgundy, or even a green pumpkin for a unique look.
That’s it
Crocheting an Orange Autumn Pumpkin Bag is the perfect way to embrace the fall season and Halloween spirit.
Whether you use it as a trick-or-treat bag, a decorative tote, or just a fun seasonal accessory, this bag is sure to bring festive cheer wherever it goes.
I hope you enjoyed this tutorial and feel inspired to create your own pumpkin bag!
Be sure to share your finished creations with me. I’d love to see how you personalize your bags and make them your own.
Be sure to share your beautiful work on crochet patternz community. I’d love to see how you personalize your project!
Happy crocheting : )


