How to Crochet an Autumn Wheat Baby Sweater: A Cozy and Adorable Fall Project
There’s something magical about autumnm, the crisp air, the golden leaves, and the cozy feeling of wrapping up in warm layers.
And what better way to celebrate the season than by crocheting an Autumn Wheat Baby Sweater?
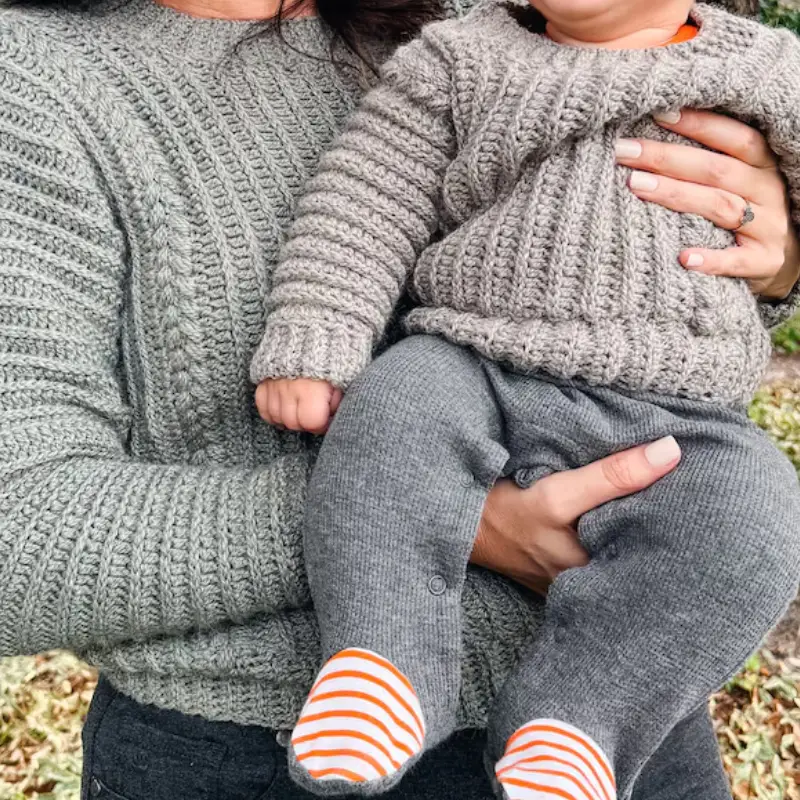
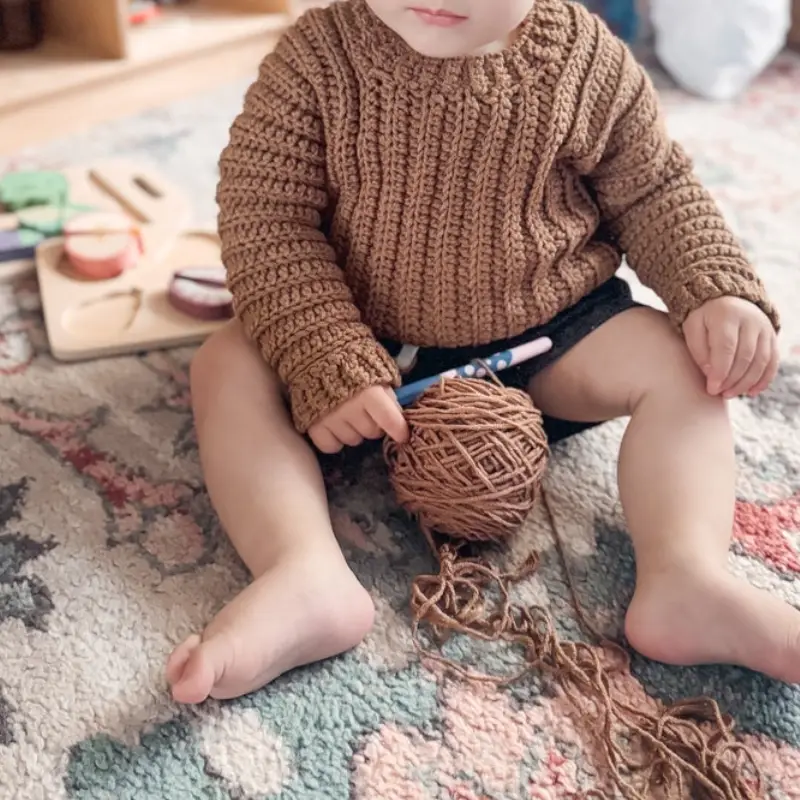
This adorable and snuggly sweater is perfect for your little one, or it makes a thoughtful handmade gift for any baby in your life.
With its warm, earthy tones and simple yet beautiful design, this project is a joy to make.
Whether you’re a crochet beginner or a seasoned pro, this step-by-step guide will walk you through everything you need to create this delightful autumn-inspired sweater.
Let’s get started on this heartwarming project!

Materials You’ll Need:
Before we dive into the crochet magic, let’s gather all of our materials:
Yarn: Choose a worsted-weight yarn in warm autumn colors like golden wheat, burnt orange, or soft brown. For a soft, baby-friendly feel, opt for natural fibers like cotton or a cotton-blend yarn.
Crochet Hook: A size 5.0mm (H-8) crochet hook works well with worsted-weight yarn.
Stitch Markers: These will help you keep track of your rounds and rows, especially for the yoke and sleeves.
Yarn Needle: For weaving in ends and sewing pieces together.
Scissors: To cut your yarn.
Stitches You’ll Need to Know:
Here’s a quick overview of the stitches we’ll be using:
Chain (ch): A basic crochet stitch that creates the foundation of most projects.
Single Crochet (sc): A compact, simple stitch that’s perfect for baby garments.
Double Crochet (dc): A taller stitch that adds height and texture.
Slip Stitch (sl st): Used to join rounds and finish off your work.
How to Crochet an Autumn Wheat Baby Sweater: Step by Step
Now that we have everything ready, let’s dive into the steps to create this adorable autumn baby sweater!
Step 1: Crochet the Yoke
We’re starting at the top of the sweater and working our way down.
The yoke will form the neckline and shoulders.
Foundation Chain
Begin by chaining 40 (or more if you need to adjust for a slightly larger size).
Row 1 – Single Crochet
Starting in the second chain from your hook, make 1 single crochet in each chain across.
This row will form the back of the neckline. Chain 1 and turn your work.
Row 2 – Increasing
In this row, we’ll start increasing to create the raglan sleeves.
Work 1 single crochet into the first 5 stitches, then place a stitch marker.
In the next stitch, work 2 single crochets.
Place another stitch marker after the increase.
Repeat this process across the row, working 5 single crochets between each set of stitch markers. Chain 1 and turn your work.
Row 3 and Onward – Continue Increasing
For the next several rows, you’ll continue increasing at the points where you placed stitch markers.
This will shape the sweater so that it can fit nicely over the baby’s shoulders and arms.
Keep increasing in the same manner until the yoke is about 6 inches deep from the neckline to the bottom edge.
Step 2: Divide for the Body and Sleeves
Once the yoke is complete, it’s time to divide your work into sections for the body and the sleeves.
Separate the Sleeves
To create the armholes, you’ll crochet across the front stitches, skip the sleeve stitches, and then continue crocheting across the back stitches.
Slip stitch to join at the end of the row. This will leave the sleeves unworked for now, but we’ll come back to them later!
Work the Body
Once the sleeves are set aside, continue crocheting in rows to work the body of the sweater.
The rest of the body is worked in double crochet to give the fabric a bit more drape and flexibility.
Step 3: Add Texture to the Body
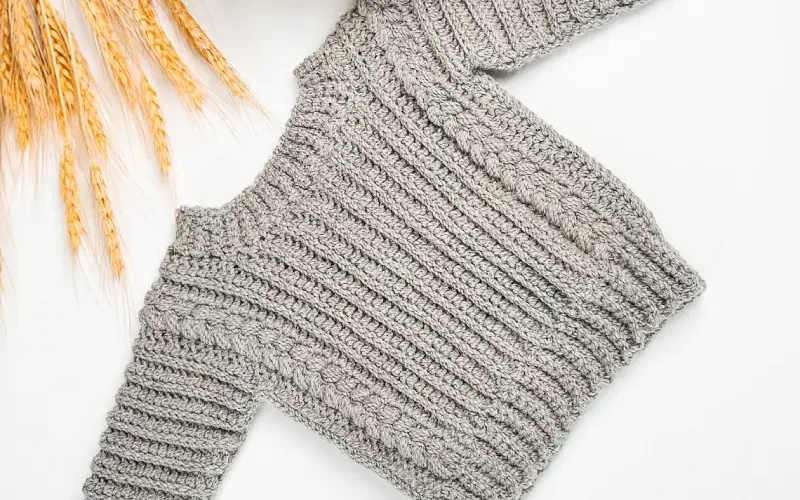
To give the Autumn Wheat Baby Sweater a beautiful texture that mimics the soft, flowing look of wheat fields, we’ll use a combination of double crochet and front post double crochet (fpdc).
This will create a raised, textured stitch that gives the sweater an earthy, rustic feel, perfect for an autumn project!
Row 1 – Double Crochet
After dividing the sleeves, start the body by working 1 double crochet in each stitch across the row. Chain 2 and turn your work.
Row 2 – Front Post Double Crochet
Now we’re adding texture! Alternate between regular double crochet stitches and front post double crochet stitches.
To make a front post double crochet, yarn over, insert your hook around the post of the stitch from the previous row (instead of through the top loops), and complete the double crochet as usual.
This creates a raised stitch that stands out from the rest.
Repeat Rows
Repeat these two rows, one regular double crochet row followed by a textured front post double crochet row, until the body of the sweater reaches your desired length (usually around 10-12 inches for a baby sweater).
Step 4: Sleeves
Now that the body is complete, it’s time to return to the sleeves!
Join the Yarn: Attach your yarn at the bottom of one of the armholes, where we left off earlier.
Work in Rounds: Crochet around the armhole in single crochet, placing 1 single crochet in each stitch. Slip stitch to join the round.
Add Length: Continue working in rounds, alternating between regular single crochet and front post single crochet stitches (just like the body) to add texture.
The sleeves should be about 6-7 inches long.
Cuff: Finish the sleeves with a tighter, ribbed cuff.
To do this, work in single crochet only, decreasing slightly at the beginning of each round to taper the cuff.
Repeat this process for the other sleeve.
Step 5: Finishing Touches
You’re almost there! The final step is to add a few finishing touches to complete your sweater.
Neckline: If you want a neater neckline, you can add a round of single crochet around the neck to give it a more polished look.
Weave in the Ends: Use your yarn needle to carefully weave in any loose ends from your color changes or yarn joins.
Blocking (Optional): For an extra professional finish, block your sweater.
Wet it lightly, shape it to the right size, and let it dry flat.
This will even out your stitches and make the sweater look extra polished.
Styling and Gifting Your Autumn Wheat Baby Sweater

Your gorgeous Autumn Wheat Baby Sweater is now complete!
The warm tones and cozy texture make it a perfect piece for chilly fall days.
Pair it with tiny leggings, boots, and a little beanie for the ultimate autumn baby outfit. This sweater also makes a thoughtful and heartfelt baby shower or holiday gift, especially for fall and winter babies.
Whether you’re dressing up your own little one or gifting it to a friend, this sweater is bound to become a cherished item.
Plus, you’ll get the satisfaction of knowing it was made with love and care.
Thoughts
Crocheting an Autumn Wheat Baby Sweater is a rewarding project that lets you play with textures, cozy fall colors, and create something functional and beautiful.
It’s a great way to celebrate the changing season, and the end result is a handmade garment that will be treasured for years.
So, grab your crochet hook, select your favorite autumn hues, and let’s get crocheting!
Don’t forget to share your creations on Crochet Patternz Community, I’d love to see how your baby sweaters turn out.
Happy crocheting, and here’s to a warm, cozy autumn!


